Reconcile in QuickBooks Online
Reconciliation in QuickBooks Online has become an essential tool for small business book-keeping owners to compare the bank feed of the chart of accounts with QuickBooks Online. You will have to match all the related cash flows on your bank statements with your entries in QuickBooks Online for a seamless process in your business. In this Blog, you will come across the steps of How to Reconcile in QuickBooks Online.

How to Reconcile in QuickBooks Online
Before we jump into the detailed steps about how to reconcile in QuickBooks Online, let’s have quick Instructions:
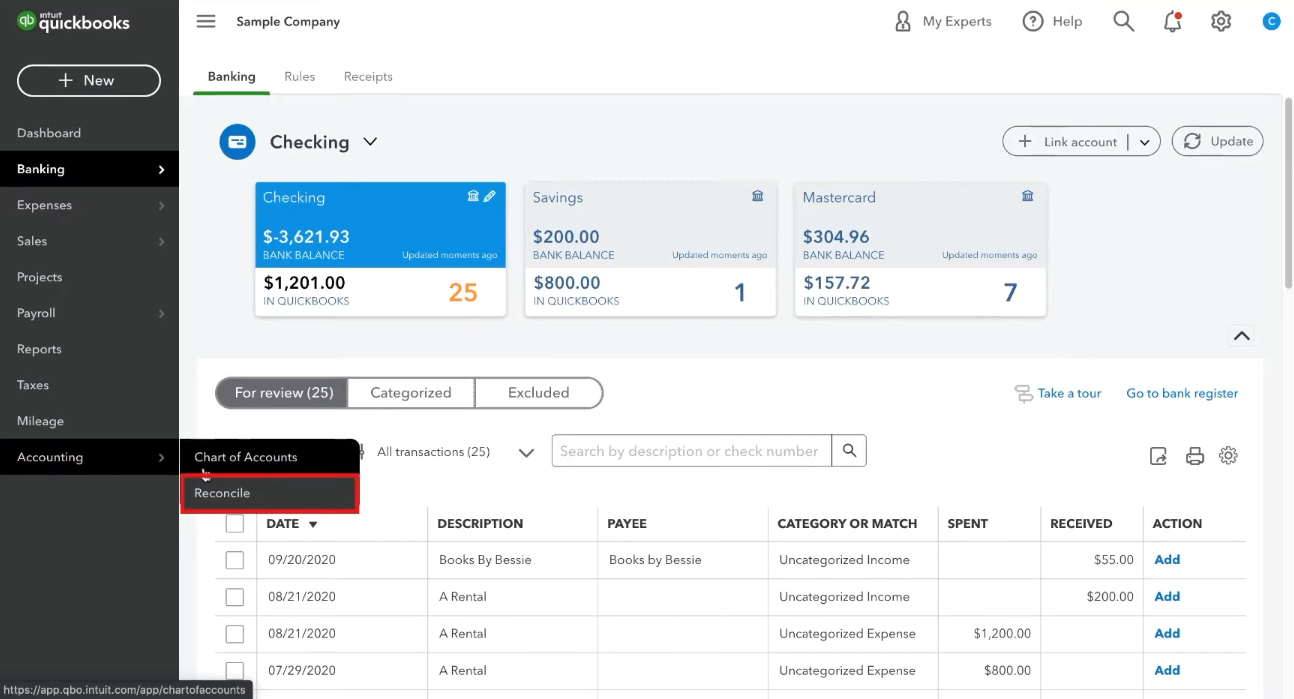
1. Be ready with the account’s bank statement on hand so that you may reconcile it. Click on the Gear icon, then under Tools, click on Reconcile.
2. Click on the Accounts drop-down menu and select the bank account you want to reconcile.
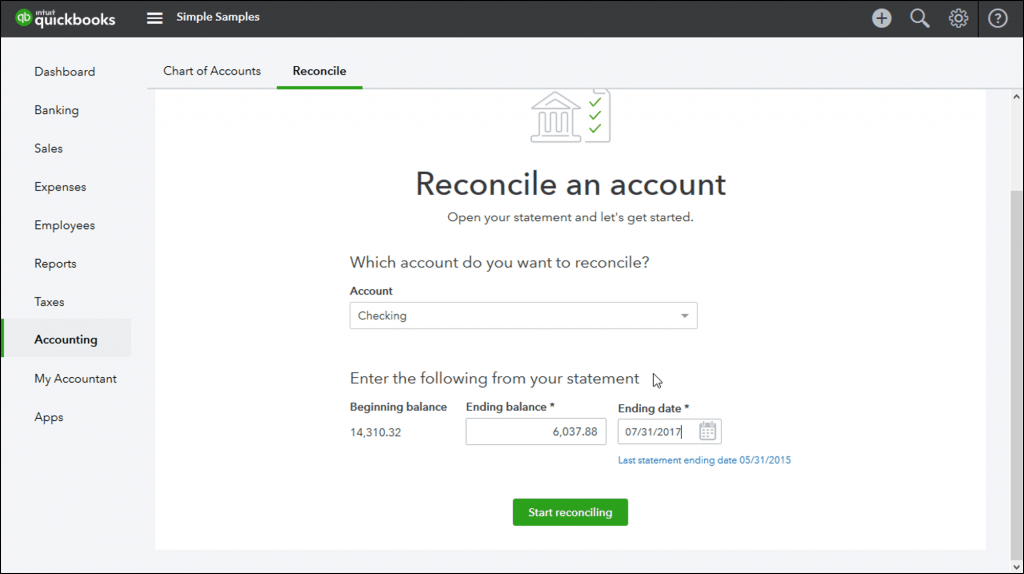
3. Enter the Ending balance and Ending date as they appear on your bank statement.
4. Make sure your bank statement and the initial balance in QB correspond by matching the transactions on your bank statement to the transactions you have recorded in QuickBooks and check off each transaction as “cleared,” applying filters to find transactions more easily if needed.
5. Enter the final balance.
6. Enter the statement’s final date.
7. Select “Start reconciling” from the green menu.
8. All transactions that line up with your bank statement should be checked off. So, continue to match and check off one transaction at a time until the Difference field shows a value of zero and you see a “Success” notification.
9. You can also print the reconciliation report if required.
10. The reconciliation process can be repeated for your checking account, savings account, and credit card accounts, as relevant.
Now that we have a quick intro, let’s keep reading for the full instructions with screenshots.
Reconciliation and its purpose in QuickBooks:
To ensure the accuracy and matches of the cash flows, we reconcile by comparing two related accounts. Similar to balancing your checkbook, you need to do this review in QuickBooks. You should reconcile your bank and credit card payments in QuickBooks frequently to make sure they match your real-life bank accounts. If you decide to hire a QuickBooks accountant, this professional will most likely complete bank reconciliations for you as part of their small business bookkeeping services.
Step 1: The Reconcile screen:
The Reconcile page can be accessed in two ways on QuickBooks Online:
1. Click on Accounting in the panel on the left side of the screen and select Reconcile.
- 2. Click on the Gear icon, then under Tools, click on Reconcile.
Step 2: SELECT THE ACCOUNT TO RECONCILE IN QUICKBOOKS ONLINE
From the drop-down menu select the appropriate account to be reconciled, it could be either a Credit or a savings account. You can go ahead with “Resume Reconciling” if you have already started reconciliation. However, you would have to begin the process by clicking on “Reconcile.” Remain conscious of errors that may be shown if the account is not ready to be reconciled. In that case, you must proceed to the hyperlink “We can help you fix it.” The financial statements of the Business Owners will benefit from this step to the fullest for they will be able to find their outstanding checks at ease.

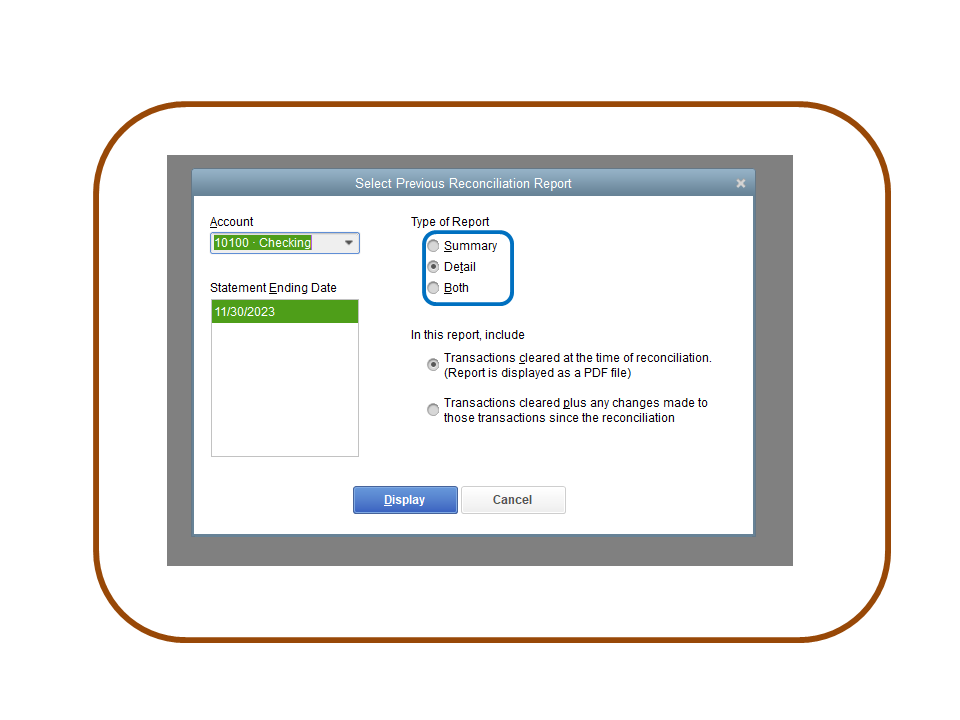
You can witness two hyperlinks namely “Summary” and “History by Account” In the “Reconcile Page”.

If you click on Summary, you will be able to view a list of past reconciliations and the dates they were completed.
The same list appears when you click on History by Account, along with any modifications or auto-adjustments done by QuickBooks. On this page, you may also print a reconciliation report for any earlier reconciliations.

Step 3: ENTER THE INFORMATIONS OF YOUR BANK STATEMENT:
There are three critical fields in the Reconcile page:
- Beginning balance
- Ending balance
- Ending date
Find the ending balance and statement ending date on your bank-provided statement and enter them into the fields. If you’ve chosen to go paperless, you should be able to open the bank statement from your online banking account.
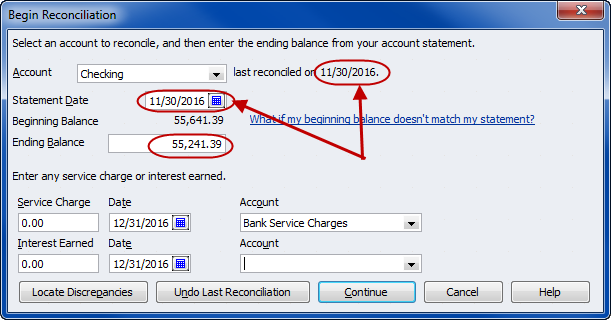
The ending balance of the prior month should always be similar to the beginning balance of the current month, and it will be auto-populated by QuickBooks online. Hereby, it is mandatory to ensure that the previous month’s reconciliation has been performed without any error before you begin your most recent bank statements. Once you’ve entered your statement information, click on Start reconciling.
We will put this as the end date if we wish to reconcile the bank statement for the month that ends on December 31, 2016. The bank statement’s ending balance would need to be entered here. The ending balance of the previous month, November 30, 2016, would be automatically entered into the “beginning balance” section. The next step is to choose “Start Reconciling.”
Step: 4 Transactions that have to be matched and cleared
Here is the core and fun part. When your bank statements appear on your screen, you have to go through the list of the transactions one at a time. At the end of the line check the circle, if the details have matched.
That transaction will be noticed as “Cleared,” and the cleared amount will be subtracted from the difference displayed at the top of the screen. The core part here is to check off all the transactions until the “Difference” starts showing Zero, which means a match.
Deposit tracking issues: If you deposited the checks straight into your bank, there’s a good chance they were combined into a single transaction on your bank statement. This makes it challenging to link your bank statement to these itemized transactions in QuickBooks. We advise depositing client checks into the Undeposited Funds account, where they will subsequently be consolidated into a single bank deposit, to avert this.
Tip: Apply Filters So Transactions Are Easier to Find
To locate transactions more efficiently, you can filter the list of transactions by:
- Payments
- Deposits
- Cleared status (“C”)
- Transaction type
- Payee
- Date
Step 5: Apply Filters for Easy Navigation
This is considered to be an optional step, where the process of checking the credit card statements or any relevant balances becomes seamless and faster with the filters of the application. In the Find field, you can enter a reference number, amount, greater than, less than, or memo to further refine your search based on memo, reference number, amount, and so on.

Step 6: On the actions to clear the transactions Until the “Difference” Field is Zero:
Every transaction has to be checked off so that there will be no consequences for any misses to take place. The difference displayed should be zero. If the difference has failed to match then you need to work out again and find the reason behind “why?”.
In a few or some of the cases, the transactions that are present in your bank statement were not entered into QuickBooks Online. Before proceeding with the reconciliation procedure, you will need to save your work and add the missing transactions if there is an issue. In some scenarios, a previously reconciled transaction could have been inadvertently unchecked by you. You can click on the Edit Info tab and fix the issue dates and/or amounts if the bank statement information was input improperly.
Save/Finish
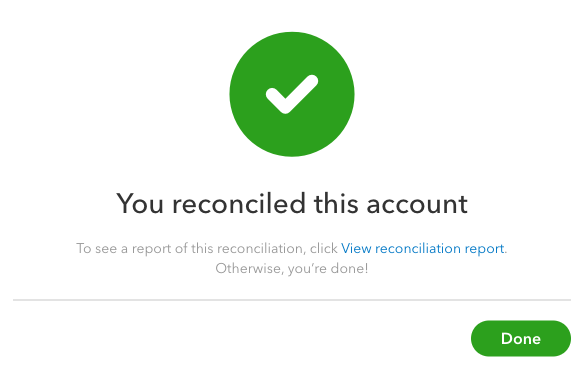
Alas!, The entries will be in order and you will see the encouraging word and that is the “Success!” message. Now you can go ahead and click Finish. If the difference isn’t zero or you don’t have time to clear all of the listed transactions at once, you can save your work and come back to it later. To save, click Save for Later and select “Save for Later” from the drop-down menu.
Step 7: Print the Compared statements if required:
If you intend to view and print the reconciliation report promptly, click View Report. If you want to run the report later, click Done. At this point, all transactions should have been cleared, the difference should be zero, and you should see the message “Success!”. Keep in mind that by selecting History by Account, you may see and print reconciliation outcomes from prior months.
Step 8: Reiterate the process:
Once you have finalized the account of the Bank Reconciliation, do not end the process as you still need to repeat the process for all of your business accounts, including your expense account, checking account, and any other accounts that are linked to your QuickBooks account. 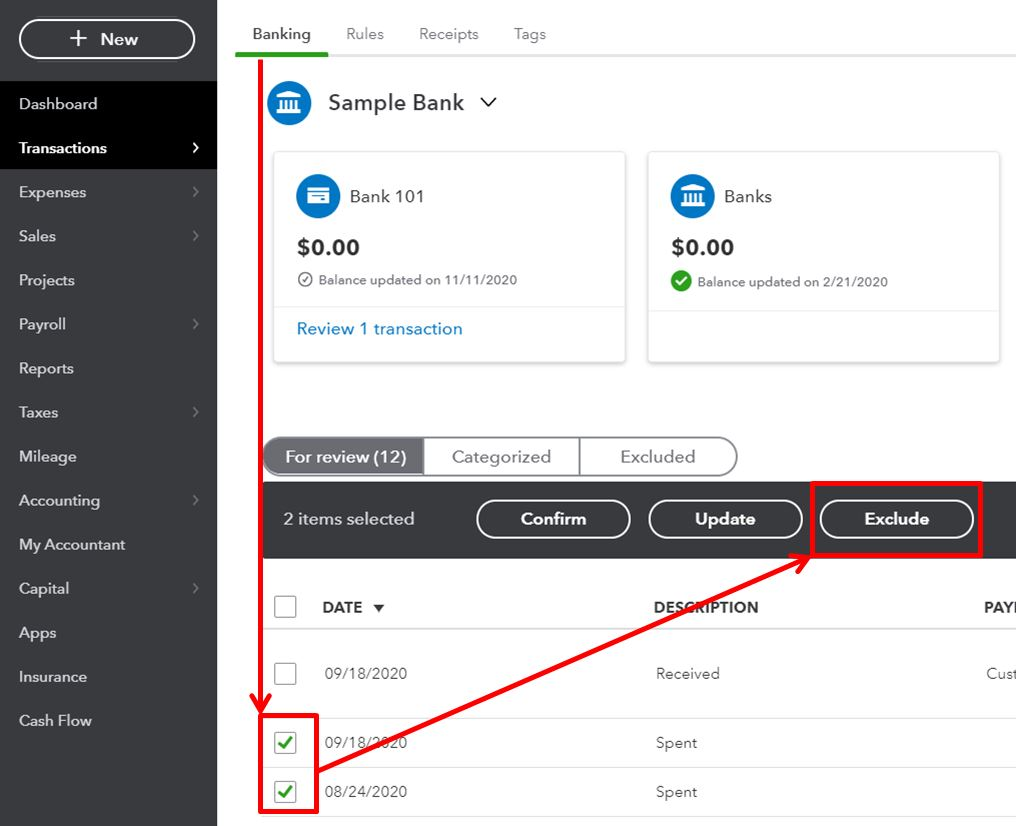
In addition, certain firms would need to reconcile other forms of income, such as interest. Think about selecting a tax expert who can provide you with guidance on all the many kinds of revenue and expenses that you must balance.
There are several reasons why you should reconcile your bank accounts in QuickBooks:

BENEFITS TO RECONCILE IN QUICKBOOKS ONLINE
Accuracy: Reconciling your bank accounts ensures that the transactions recorded in QuickBooks match the activity on your bank statement. This helps in identifying any discrepancies or errors that need to be addressed.
Fraud Detection: Reconciling your bank accounts allows you to quickly identify any unauthorized transactions or fraudulent activity. By comparing your bank statement with QuickBooks, you can spot any discrepancies and take necessary action to protect your finances.
Financial Reporting: Reconciling your bank accounts ensures the accuracy of financial reports generated in QuickBooks. This is important for making informed business decisions and presenting accurate financial information to stakeholders.
Error Identification: Reconciling your bank accounts helps in identifying any mistakes made during data entry or recording transactions in QuickBooks. It allows you to correct these mistakes and maintain accurate financial records.
Cash Flow Management: Reconciling your bank accounts provides an accurate picture of your cash inflows and outflows. This helps in managing your cash flow effectively and making sound financial decisions.
Conclusion:
In conclusion, reconciling your bank accounts in QuickBooks Online is an important process for maintaining accurate financial records and managing your business effectively. By comparing the transactions recorded in QuickBooks with your monthly bank statement on monthly basis, you can ensure that your records are up-to-date and accurate. Reconciliation helps identify any discrepancies, errors, or fraudulent activity, allowing you to take prompt action and protect your finances.
Also, reconciling bank accounts in QuickBooks Online ensures the accuracy of financial reports and provides clarity on your cash flow position. By regularly reconciling your bank accounts, you can make informed business decisions and have peace of mind knowing that your financial records are reliable.
Overall, reconciling your bank accounts in QuickBooks is essential for maintaining accurate financial records, detecting fraud, and making informed business decisions.